DIY Attic Cleanup vs. Hiring a Professional: When You Can Do It Yourself and When You Shouldn't
Quick Answer
If your attic just needs general cleaning and organizing, you can probably handle it yourself with basic safety gear. If there’s rodent contamination, mold, suspected asbestos, or damaged insulation that needs removal and replacement, hire a professional. The health risks of disturbing contaminated materials without proper equipment and containment are real, and the cost of professional cleanup is a lot less than the medical bills from hantavirus exposure or asbestos-related illness.
Key takeaway: The question isn’t just whether you can do the work. It’s whether you can do it safely. General attic tidying is fine for most homeowners. Contamination cleanup is not a DIY job.
What You Can Safely Do Yourself
Let’s start with the good news. There are plenty of attic tasks that a reasonably handy homeowner can handle without professional help.
Safe DIY Attic Tasks
| Task | Difficulty | Safety Gear Needed | Estimated Time |
|---|---|---|---|
| General decluttering and organizing | Easy | Dust mask, gloves, headlamp | 2-4 hours |
| Light dust and cobweb removal | Easy | N95 respirator, goggles | 1-2 hours |
| Visual insulation inspection | Easy | N95, goggles, headlamp | 30-60 minutes |
| Checking for obvious damage | Easy | N95, goggles, headlamp | 30-60 minutes |
| Adding weatherstripping to attic hatch | Easy | Minimal | 30 minutes |
| Sealing small air gaps with caulk | Moderate | N95, goggles | 1-3 hours |
| Removing clean, dry fiberglass batts | Moderate | Full PPE (see below) | 3-6 hours |
| Adding blown-in over existing (rental machine) | Moderate-Hard | Full PPE | 4-8 hours |
A quick attic inspection is actually something every homeowner should do once or twice a year. Our guide on how to check your insulation in 10 minutes walks you through exactly what to look for without getting into anything risky.
Pro tip: The best time for attic work in the Seattle area is early morning between April and October. Attic temperatures can hit 120 degrees F or higher on summer afternoons, even in the Pacific Northwest. Heat exhaustion is a real risk. Start early, take breaks, and bring water.
What You Should NOT Do Yourself
This is the list that matters most. These situations involve genuine health hazards that require professional equipment, training, and containment protocols.
Hazards That Require Professional Help
1. Rodent Contamination
If you see droppings, urine stains, nesting material, or any signs of rodent activity, stop and back out of the attic.
Rodent droppings in Pacific Northwest attics can carry hantavirus, which becomes airborne when disturbed. Sweeping, vacuuming with a standard vacuum, or shoveling contaminated insulation sends microscopic particles into the air that you breathe in. Hantavirus has a fatality rate of roughly 36%.
Professional attic cleanup crews use HEPA-filtered vacuums, full-body PPE with supplied air respirators, and containment protocols that prevent cross-contamination into your living space. They also sanitize and enzyme-treat the space after debris removal to neutralize remaining pathogens.
Signs of rodent contamination to watch for:
- Dark, pellet-shaped droppings along joists, walls, and near entry points
- Yellow or brown urine staining on insulation and wood
- Shredded insulation or paper used as nesting material
- Gnaw marks on wiring, wood, or stored items
- Grease marks (rub marks) along travel paths
If you’re seeing these signs, the damage may extend beyond cleanup. See our breakdown of rodent damage repair costs for what to expect.
2. Mold Growth
Mold in attics is common in the PNW, especially on north-facing roof sheathing where condensation collects during cold months. If you see black, green, or white fuzzy growth on wood surfaces:
- Do not scrub it, spray it, or try to treat it yourself. Disturbing mold sends spores airborne, and bleach does not kill mold on porous surfaces like wood.
- Mold remediation requires containment barriers, HEPA air filtration, proper removal techniques, and treatment with antimicrobial agents.
- Washington state has specific requirements for mold remediation depending on the size of the affected area.
A few spots of surface mold on a small area (under 10 square feet) is technically within the range a homeowner can address with proper precautions. Anything larger, or any mold that has penetrated into the wood grain, needs professional remediation.
3. Suspected Asbestos
Homes built before 1990 may have asbestos-containing materials in the attic:
- Vermiculite insulation (small, gray-brown pebble-like granules) — commonly sold under the brand name Zonolite, frequently contaminated with asbestos
- Older pipe wrap or duct insulation — white, chalky material around pipes or HVAC ducts
- Some older building materials — certain tiles, adhesives, and coatings
Never disturb suspected asbestos. If your home has vermiculite insulation, do not enter the attic without professional assessment. Asbestos fibers are invisible and cause mesothelioma and other serious lung diseases decades after exposure.
Have the material tested by a certified lab before any work begins. If asbestos is confirmed, licensed asbestos abatement contractors handle the removal under strict regulatory protocols.
4. Electrical Hazards
Attics are full of electrical wiring, and older homes often have wiring that doesn’t meet current codes. Hazards include:
- Knob-and-tube wiring (common in pre-1950s Seattle homes) — insulation cannot safely touch this wiring
- Damaged or rodent-chewed wiring with exposed conductors
- Junction boxes buried under insulation
- Old wiring with degraded insulation
If you encounter any damaged or unfamiliar wiring during attic work, don’t touch it. Have an electrician assess and repair it before any insulation or cleanup work continues.
Safety Gear Requirements
If you’re doing safe DIY attic tasks, proper gear is non-negotiable. Attic environments contain fiberglass particles, dust, potential allergens, and limited ventilation.
Minimum Safety Gear for Any Attic Work
| Equipment | Purpose | Approximate Cost |
|---|---|---|
| N95 or P100 respirator | Protects against dust, fiberglass, and particles | $3-$5 (disposable) or $30-$50 (half-face reusable) |
| Sealed safety goggles | Keeps fiberglass and dust out of eyes | $8-$15 |
| Heavy work gloves | Protects hands from fiberglass, splinters, nails | $10-$20 |
| Long sleeves and pants | Prevents fiberglass skin irritation | Use old clothes you can wash separately |
| Knee pads | Protects knees on joists | $15-$25 |
| Headlamp | Hands-free lighting in dark spaces | $15-$30 |
| Walking boards | Safe surface across joists (prevents falling through ceiling) | $10-$20 (plywood) |
Upgraded Gear for Insulation Removal
| Equipment | Purpose | Approximate Cost |
|---|---|---|
| Half-face respirator with P100 cartridges | Better protection during insulation handling | $30-$50 |
| Disposable Tyvek coveralls | Full-body protection, keeps fiberglass off skin | $8-$15 per suit |
| Boot covers | Prevents tracking contaminated material downstairs | $5-$10 |
| HEPA vacuum | Proper cleanup of fine particles | $200-$400 (purchase) or $50-$75/day (rental) |
| Heavy-duty contractor bags | Disposing of old insulation | $15-$25 per box |
Pro tip: If the total cost of safety gear and rental equipment starts approaching $300 to $500, you’re getting close to the point where professional help makes more financial sense, especially since pros come with experience, insurance, and proper disposal.
Cost Comparison: DIY vs. Professional
| Task | DIY Cost | Professional Cost | Notes |
|---|---|---|---|
| General attic cleaning | $50-$150 (gear + supplies) | $300-$800 | DIY is reasonable here |
| Insulation removal (1,200 sq ft) | $200-$500 (gear + disposal) | $1,000-$2,500 | DIY saves money but takes a full day |
| Contamination cleanup | Not recommended | $1,500-$4,000 | Health risks make DIY unsafe |
| Insulation removal + new blown-in | $600-$1,200 (rental + materials) | $2,500-$5,000 | Pro install ensures correct R-value |
| Full attic restoration | Not feasible DIY | $3,000-$8,000 | Includes cleanup, sanitizing, air sealing, new insulation |
| Mold remediation | Not recommended | $1,500-$6,000 | Requires containment and proper treatment |
| Rodent cleanup + proofing | Not recommended | $1,500-$5,000 | Health hazard + exclusion work needed |
When DIY Saves Real Money
DIY makes sense when the work is straightforward and the attic is clean:
- Removing clean, dry old batts and bagging them for disposal
- Adding weatherstripping and basic air sealing
- General organizing and decluttering
- Basic inspections and monitoring
When Professional Help Saves You Money Long-Term
Professional service pays for itself when:
- Contamination is present — Improper DIY cleanup can spread contaminants into your HVAC system and living space, creating a much more expensive problem
- Insulation needs to hit specific R-values — Professionals have the equipment and experience to achieve consistent R-49 coverage that most DIY installations miss
- Multiple issues overlap — Rodent damage plus insulation replacement plus air sealing is a project that benefits enormously from a crew that handles all three in a coordinated sequence
- You value your time — A professional crew completes in one day what takes a homeowner an entire weekend, with better results
The Hidden Risks of DIY Attic Work
Beyond the obvious health hazards, there are practical risks that homeowners often don’t consider:
Falling through the ceiling. Attics have joists, not floors. One wrong step onto drywall between joists means you’re going through your ceiling. This is the most common DIY attic injury, and it creates an expensive repair on top of potential physical injury.
Inadequate insulation performance. DIY insulation installation almost always underperforms professional work. Uneven coverage, missed areas, compressed material around obstacles — these gaps reduce your effective R-value significantly. You save on installation but lose on energy bills for years.
No warranty or insurance. If something goes wrong during a professional installation — a worker damages your property, or the work doesn’t perform as promised — the contractor’s insurance and warranty cover it. DIY mistakes come out of your pocket.
Disposal challenges. Old insulation, contaminated materials, and construction debris require proper disposal. You can’t put contaminated insulation in your regular garbage. Hauling it to an appropriate disposal facility takes time and costs money.
Pro tip: If you’re on the fence, ask for a free estimate from a professional. Compare the quote to your realistic DIY costs including gear, disposal, and your time. The gap is often smaller than people expect, especially for larger jobs.
A Practical Decision Framework
Ask yourself these questions in order:
- Is there any sign of rodent activity, mold, or suspected asbestos? If yes, call a professional. Full stop.
- Does the work involve removing or installing insulation? If removing contaminated insulation, call a professional. If removing clean material or adding new, DIY is possible with proper gear and patience.
- Is the attic easily accessible with safe footing? Tight, low-clearance attics with no walkways increase the risk of injury and make DIY work miserable.
- Do you have or can you rent the right equipment? Respirator, HEPA vacuum, blowing machine, proper disposal — add up the real costs before committing.
- How much is your time worth? A weekend of hot, uncomfortable, physically demanding work in a cramped attic has a real value, even if you don’t bill by the hour.
Get a Professional Assessment
If you’re not sure what your attic needs, start with a professional inspection. Sadeq and the Green Attic team will look at your attic, identify any contamination or damage, assess the insulation condition, and give you a straight answer about what you can handle yourself and what needs professional attention.
Schedule a free attic inspection — we’ll crawl through the space so you don’t have to, tell you exactly what we find, and give you options with clear pricing. If it turns out your attic just needs a good cleaning and you can handle it yourself, we’ll tell you that too. We provide attic cleanup and restoration across King County and Snohomish County.

"I never discourage homeowners from doing their own work if it's safe. Clearing out old boxes and debris from an attic? Absolutely, go for it. But the moment you see rodent droppings or dark staining on the insulation, stop. That's contaminated material, and handling it without proper equipment puts your health at risk."
Sadeq, Owner
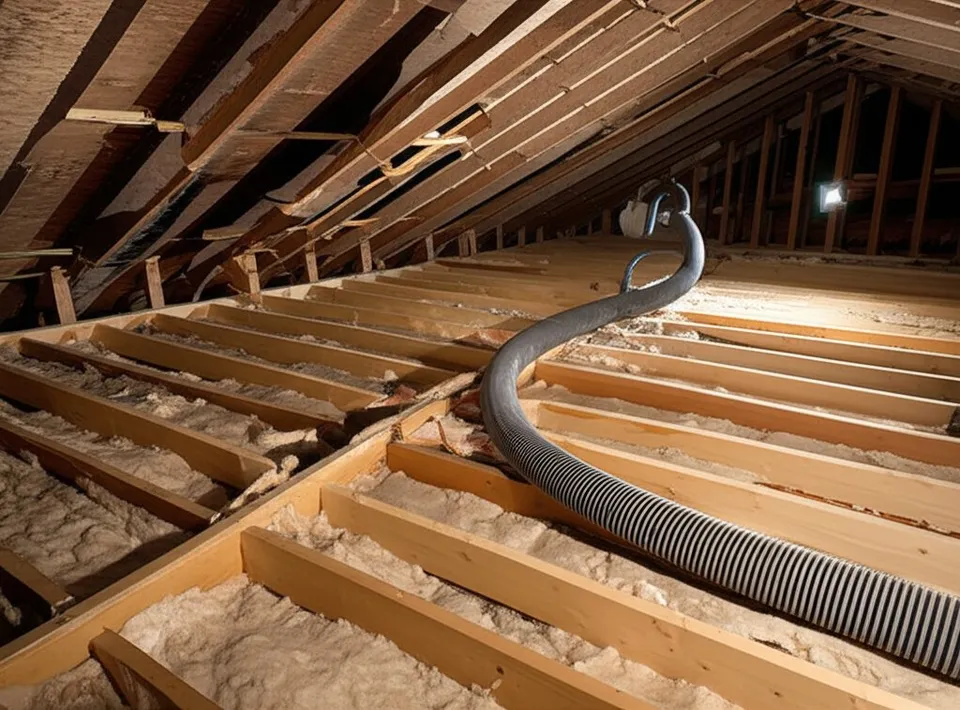
"The equipment gap is real. We use industrial vacuum systems that pull insulation out through a 4-inch hose directly into a truck-mounted container. A homeowner with garbage bags and a shop vac is looking at a full weekend of miserable work. And the shop vac doesn't have HEPA filtration, so you're just recirculating contaminants."
Sadeq, Owner
Frequently Asked Questions
Can I clean my attic myself?
It depends on what you are cleaning up. General decluttering, light dust and debris removal, and inspecting insulation condition are safe for most homeowners with basic safety gear. However, if there are rodent droppings, animal nesting, mold growth, suspected asbestos-containing materials, or damaged insulation that needs removal, you should hire a professional. The health and safety risks of contaminated attic work are serious and not worth saving a few hundred dollars.
How much does professional attic cleanup cost in Seattle?
Professional attic cleanup in King County and Snohomish County typically costs $1,500 to $5,000 for a standard home. This includes debris removal, contamination cleanup, sanitization, and often insulation removal if needed. Full attic restoration with new insulation runs $3,000 to $8,000 or more depending on attic size and scope of work. A basic inspection is usually free when bundled with an estimate.
Is it safe to remove old attic insulation myself?
Removing old fiberglass batts in a clean, dry attic is possible for a careful DIYer with proper safety gear including an N95 or P100 respirator, goggles, gloves, and full-body coveralls. However, if the insulation is vermiculite which may contain asbestos, contaminated with rodent droppings or urine, wet or moldy, or if your home was built before 1990, have a professional assess it first. Disturbing contaminated insulation without proper containment can spread hazardous particles throughout your home.
What safety gear do I need for attic work?
At minimum you need an N95 respirator or half-face respirator with P100 cartridges, sealed safety goggles, heavy work gloves, long sleeves and pants, knee pads, a headlamp, and sturdy boards to walk on across joists. For any work involving contaminated materials, upgrade to a full-face respirator, disposable Tyvek coveralls, and boot covers. Work in the early morning during summer when attic temperatures are coolest.
How do I know if my attic has rodent contamination?
Look for small dark pellet-shaped droppings concentrated along walls, joists, and near entry points. Rodent urine stains appear as dark spots on insulation and wood, sometimes with a visible yellow or brown discoloration. You may also find gnawed wiring or wood, nesting material made from shredded insulation or paper, and grease marks along travel paths on joists. If you see any of these signs, do not disturb the material. Rodent droppings can carry hantavirus and other pathogens that become airborne when disturbed.
Should I clean my attic before getting new insulation?
Yes. Installing new insulation over a contaminated or deteriorated attic is like painting over rust. The problems underneath will continue to cause issues. Old droppings, moisture damage, and degraded insulation should be removed and the space sanitized before new material goes in. A professional attic cleanup followed by fresh insulation is the standard approach for attic restoration projects.